It has been 3 months to the day since I have started this project. I have shot myself in the foot a few times, and lost a few plants, but I have learned a lot. And I have now harvested my first hydroponic grown plants. Just a few days ago I picked two nice bell peppers. Today I have picked my first tomato.
Here is a breakdown of where I am at.
Tomatoes
If you look at my first picture of the tomato clones you will see two buckets with about 8" cuttings. It took about a week for the roots to show on these. These two plants are doing fine. One is 6 foot tall and the other about 4 1/2 feet. That plant was initially set back as I tried to grow it on miracle grow plant food. It is an early girl variety. Here it is now with a picture of the first ripe tomato from my new garden. The second photo is another early girl clone that was cut from the same plant about 2 weeks later. I rooted it in my aeroponic system and much to my surprise the roots appeared in only 3 days. This plant is now healthy and about 3 foot tall.


I now have a total of six tomato plants in individual bucket systems. And I have several more seedlings that will have to be transplanted in a few weeks.
Here are a few more additional photos showing the size of the plants next to my wife who is 5'2" tall.


I have started the plants on shelves and I have repeatedly moved them down a notch as the grow nearer to the lights. The next move will put them on the floor. That will give me a maximum height of about 7 1/2 feet as I have a 8 foot ceiling, but I have to leave a little room for the lights. If you will notice there is a yellowish tint to the light. Just two weeks ago I added a high pressure sodium bulb which has a color temp of about 2000K. This bulb is geared to promote budding. My biggest tomatos are now starting to show signs of small buds. From the looks of things these plants will have numerous tomatoes.
There is also a photo of my wife seated next to two bell peppers. Since the photo shoot I have picked these peppers. I must confess, as I cheated on these pepper plants. They were in my garden this summer. The plants were still healthy, so three weeks ago I dug them up, washed the dirt off the roots and then tranplanted into their own bucket systems. If you will look close in an additional photo you will see some new leaves and buds on these plants. I am really excited about these peppers, as it was only an experiment, and they seem to be doing quite well.

Cucumbers
I started these plants from seeds. This first plant is in an aeroponic system run on a timer that kicks on for one mintue then off for 10 minutes. This plant is 2 foot tall and continues to chase the light. I have a trellis on the top of the bucket. I originally thought that I would have to train the plant up. The plant beat me to it. There is little green runners that reach out and wrap around anything in order to support itself. Even my light cord. Surprisingly thse runners are quite strong. This plant is now two foot tall and starting to bloom. If you will look closely in the photo you will see a tiny cucumber right behind the blossom. This is a female cucumber bud. When the pedals open up it will have to be fertilized or the fruit will not develope. The cucumber plant has both male and female flowers. When the female flower is ready I will take a tiny paint brush and dab it on the stamen of the male flower to get a little pollen and then dab it again on the female flower. Normally bees and wind would accomplish this task, but since the plants are indoors I will have to do the fertilizing.

This plant has a four foot trellis and a brooder lamp fixture that is right down on top of plant. As the plant grows I just move it up. I have screwed in a Y adapter and added one 23 watt 6500K cfl and one 23 watt 2700K cfl. Both of these bulbs put out equivalent to a 100 watt incadesent light. The 6500K bulb spurs vegatative growth and the 2700K promotes budding.
I also have two other cucumber in deep water culture systems, which are no more than a 5 gallon bucket with an airstone in it to keep the nutrient solution well oxygenated.
Potatoes???
Well I had not planned on this, but one day while I slept my wife dug up a late planted potato plant that did not have enough time to mature due to looming frosts that was soon to come. So she broke the plant and roots off of the original potato an placed it in a spare hole in my aeroponic systems. After one week the potato seemed to be doing fine, so pulled it up to look at the roots and much to my surprise there was tiny pea sized potatoes on them. In a couple of days the potatoes grew to quarter size! Amazing growth rate. I am now thinking about starting another system just for potatoes.
 NASA's Potatoes
Be sure to click on this video link on NASA potatoes.
Other plants to come.
This photos shows some zucchinis that I have sprouted. They will soon have their own bucket systems.

I currently also have onions in my system, and will also soon transplant okra, eggplant,and a couple types of dwarf tomatoes. I have got quite a system going here. Kind of sounds like a tropical fish store here now as there is a lot of flowing water and bubbles.




.JPG)


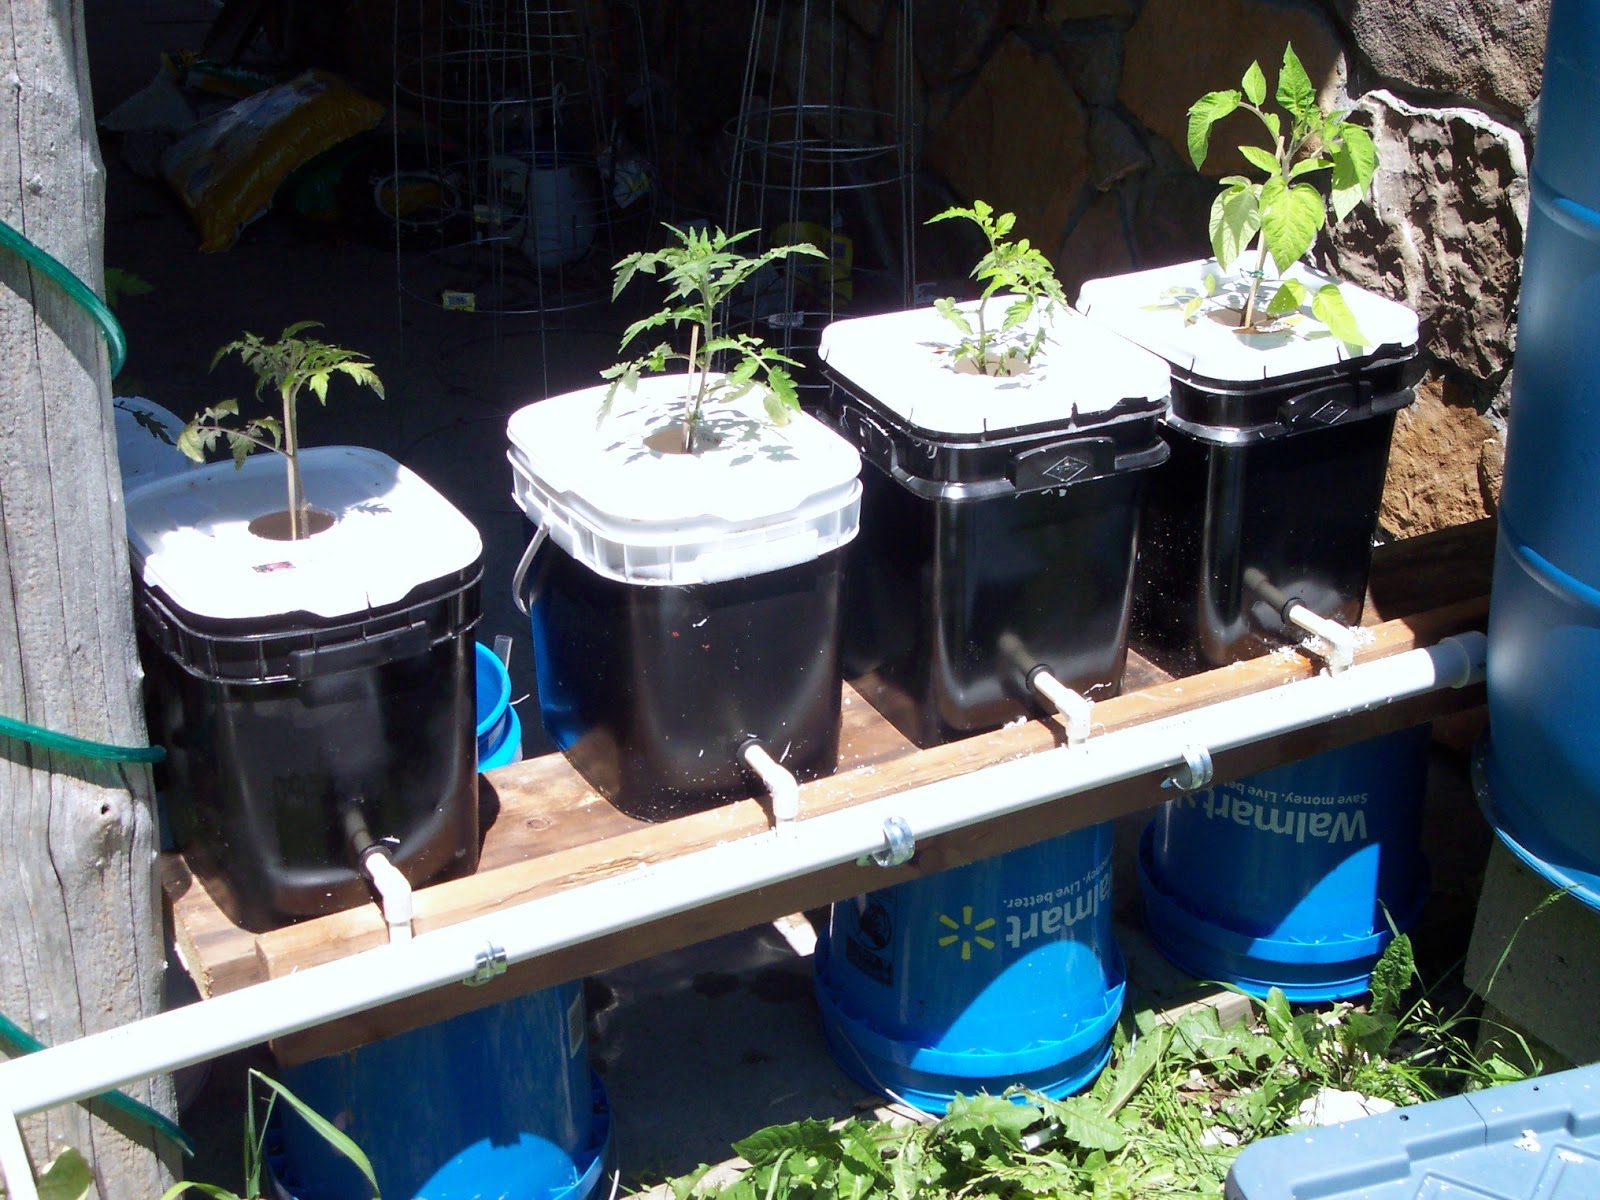
 I have been working at a fever pitch in order to get my next Dutch Bucket system up and running. I want to get the plants in the bucket by weekend. I have several clones and larger plants that need to be transplanted. I figure that the Dutch Bucket is the way to go. I currently have 12 buckets ready to go, with room for 8 more. All I have to do is add the drip lines and the pump and it will be good to go.
Today July 10, 2013 I now have my second Dutch Bucket system up and running. I have made some minor modifications to improve the integrity of the system. I have three smaller holes in the plastic tote in order to minimize entry for mosquitoes. The power cord will soon have a large grommet in order to minimize that hole. Oh yes, one important note. This tote is buried so the lid is just above ground level. This provides two advantages. During hot weather it helps keep the solution cool. I have noticed with my DWC buckets that water temps in those black buckets does get quite warm, and the plants will suffer. Also by burying the tote I gain about a foot of vertical growing space. I have started this system off with one cucumber, one ghost pepper, and one clone tomato. I now have 17 more buckets to fill.
I have been working at a fever pitch in order to get my next Dutch Bucket system up and running. I want to get the plants in the bucket by weekend. I have several clones and larger plants that need to be transplanted. I figure that the Dutch Bucket is the way to go. I currently have 12 buckets ready to go, with room for 8 more. All I have to do is add the drip lines and the pump and it will be good to go.
Today July 10, 2013 I now have my second Dutch Bucket system up and running. I have made some minor modifications to improve the integrity of the system. I have three smaller holes in the plastic tote in order to minimize entry for mosquitoes. The power cord will soon have a large grommet in order to minimize that hole. Oh yes, one important note. This tote is buried so the lid is just above ground level. This provides two advantages. During hot weather it helps keep the solution cool. I have noticed with my DWC buckets that water temps in those black buckets does get quite warm, and the plants will suffer. Also by burying the tote I gain about a foot of vertical growing space. I have started this system off with one cucumber, one ghost pepper, and one clone tomato. I now have 17 more buckets to fill.


 Actually these tomatoes have been in the system as of today 3 weeks and 6 days. This is by far the easiest way to grow tomatoes that I have ever seen. All you have to do is adjust the trellis clips every couple days, and check your resevoir a couple times a week......and just let it grow.


 I must apologize for the long pause from my updates. I had a great crop last year and will have another good crop this year. I already will pick my first tomato today which is the earliest I have ever picked a large tomato.
I currently have about 25 deep water culture tomato plants and several DWC hot peppers. However I am rapidly converting to a new system called "Dutch Buckets". It is much easier to work with. Once you set it up the system pretty much runs itself. I am into my third week now, and this system really does "kick butt". The very first week, my plants doubled in size. Today is my third week, and the growth continues. I now have 10 buckets with 7 tomatoes, and two tomato clones, and one ghost pepper.
I have already started construction of my next system, which will have 15 buckets. Next year I hope to have 50 or more dutch buckets.
Stay tuned in and I will give you a step-by-step process on how easy it is to build this system.
You can click on the image to get larger photos.
I must apologize for the long pause from my updates. I had a great crop last year and will have another good crop this year. I already will pick my first tomato today which is the earliest I have ever picked a large tomato.
I currently have about 25 deep water culture tomato plants and several DWC hot peppers. However I am rapidly converting to a new system called "Dutch Buckets". It is much easier to work with. Once you set it up the system pretty much runs itself. I am into my third week now, and this system really does "kick butt". The very first week, my plants doubled in size. Today is my third week, and the growth continues. I now have 10 buckets with 7 tomatoes, and two tomato clones, and one ghost pepper.
I have already started construction of my next system, which will have 15 buckets. Next year I hope to have 50 or more dutch buckets.
Stay tuned in and I will give you a step-by-step process on how easy it is to build this system.
You can click on the image to get larger photos.


